Archive for February 2013

Installing Exchange Server 2010 SP3 on Windows Server 2012

Not much has changed when you install exchange server 2010 SP3 on windows server 2012. You need to make sure that .Net Framework 4.5 update is installed and windows is up to date.
And if you don't installed the updates, prerequisites will failed with error, few components can't be installed or missing.


Prerequisites for windows server 2012 hasn't changed much.
Note: You don’t need to run “Import-Module ServerManager” as windows server 2012 loads the modules automatically. If you don't have internet connection to you lab machine, then run the prerequisites script with -Source D:\sources\sxs at the end of the script and make sure you have windows server 2012 media in the DVD drive.

Add-WindowsFeature NET-Framework-Core,RSAT-ADDS,Web-Server,Web-Basic-Auth,Web-Windows-Auth,Web-Metabase,Web-Net-Ext,Web-Lgcy-Mgmt-Console,WAS-Process-Model,Web-Mgmt-Tools,Web-ISAPI-Ext,Web-Digest-Auth,Web-Dyn-Compression,NET-HTTP-Activation,Web-Asp-Net,Web-Client-Auth,Web-Dir-Browsing,Web-Http-Errors,Web-Http-Logging,Web-Http-Redirect,Web-Http-Tracing,Web-ISAPI-Filter,Web-Request-Monitor,Web-Static-Content,Web-WMI,RPC-Over-HTTP-Proxy -Restart


Once it's installed. You are all set to install exchange server 2010 SP3


I must say exchange 2010 SP3 is faster, smarter and better on windows server 2012 :)

Cheers,

Microsoft Exchange Server 2010 SP3 and RU 10 for Exchange Server 2007 SP3 for full coexistence with Exchange Server 2013

Microsoft has released Service Pack 3 for Exchange Server 2010 and Update RollUp 10 for Exchange Server 2007 SP3 today.

These updates will make your existing Exchange 2010 and 2007 environment to coexist with Exchange Server 2013.
Exchange Server 2010:
Microsoft Exchange Server 2010 Service Pack 3
http://www.microsoft.com/en-us/download/details.aspx?id=36768

Issues that the service pack resolves
http://support.microsoft.com/kb/2808208

Exchange Server 2007:
Update Rollup 10 for Exchange Server 2007 Service Pack 3
http://www.microsoft.com/en-us/download/details.aspx?id=36708

Issue that the update rollup resolves
http://support.microsoft.com/kb/2788321

Note: Microsoft also released Update Rollup 6 for Exchange Server 2010 SP2.
Update Rollup 6 for Exchange Server 2010 Service Pack 2
http://www.microsoft.com/en-us/download/details.aspx?id=36716

Issue that the update rollup resolves
http://support.microsoft.com/?kbid=2746164

I would strongly suggest not to install SP3 for Exchange 2010 right now, instead play around with RU6 in the LAB first and then install it in the production. Do the same for SP3 as well.
Install the SP3 after enough testing in the LAB.

We all have been waiting for these release since few months and finally Microsoft has delivered it. Now, this is were the FUN begins.

Update: 15-02-2013
We still can't coexist exchange server 2010 SP3 with Exchange Server 2013 entirely. Cumulative update (CU) is required for Exchange 2013 for coexistence between Exchange 2010 SP3 and Exchange 2013. The change to the cumulative update model, from the past rollup update model, was just announced last Friday.

We should expect the CU for Exchange Server 2013 in the month of April or late March. Let's keep the finger cross.


Gulab Prasad

Install and Configure GFI MailArchiver for Exchange Server 2010- Part 2

In first article we learned how to install GFI MailArchiver for Exchange Server 2010. Now we will configure the MailArchiver (default configuration).

Click on Configure button after installing the MailArchiver.


Next, enter the product key which you received, either for evaluation or full license and click Next.


Next step is configure the archive store settings.


Note: At this step we have several options to choose the storage, I am going to choose the last one, GFI MailArchiver Database. Because at this time I don't have SQL Server installed in the environment. I will configure the MailArchiver with Microsoft SQL Server in different articles.


Enter Admin Login name and Password and click Next. Click next and next on coming 2 steps.


Now it's time to configure Archiving method, there are 2 type of methods available. 1: Manual Archiving and 2: Auto-Archiving (Journalling). Journalling has 2 sub options, A: All email and B: Role Based Archiving.

I am going to demonstrate second option, Auto Archiving in this article and Manual Archiving in coming articles.


First option will be selected by default "Let GFI MailArchiver create new journalling user for you to associate the mailboxes to.


Enter the admin credential and click on next, next and finish.


We have configured GFI MailArchiver successfully with default settings. Next article we will see how MailArchiver works and restore the email from the MailArchiver.


Cheers,
Gulab Prasad

Install and Configure GFI MailArchiver for Exchange Server 2010- Part 1

Let me start with this, I was never a BIG fan of GFI products. Honestly I actually avoided any product from GFI. But recently I came across with one of their product GFI MailArchiver and I must say, I was impressed with the performance, feature, easy going and off course pricing and support. Hence thought of writing a small series of article on it. Lets get started.

Installing GFI MailArchiver for exchange server 2010.
This small application has few prerequisites before you start the installation of it.
1: .Net Framework 4
2: Microsoft ASP.Net MVC 4
3: MAPI CDO
4: Microsoft Visual C++ 2005 Runtime*
* If you don't have this prerequisite already installed on the server, you can install it at the time of installing GFI MailArchiver.

LAB Environment:
A: 2 Windows 2008 Domain Controllers
B: 5 Exchange Server 2010 SP2 RU5 V2
DAG with 2 Mailbox Server
CAS Array with 2 CAS/HT Role
1 Exchange Server with HT and UM Role
C: 1 Lync Server 2010

Note: I am installing GFI MailArchiver on Exchange 2010 HT/UM Server.

Lets start the process by installing prerequisites for GFI MailArchiver. First install .Net Framework 4
Run .Net Framework 4 file As Administrator


Click Finish to complete the installation.
Now install Microsoft ASP.Net MVC 4. Agree to license agreement.


Click Close.
Install MAPI CDO which should take around a minute or 2 to complete.
Note: Make sure you don't have outlook installed on the machine/server where you are installing MAPI CDO, else the installation will fail.

Now we will start the GFI MailArchive installation.


Select the language and click OK and follow the instructions.


We don't have Microsoft Visual C++ installed on the server, we can install this component by clicking on Install Components.


Keep the default setting "Do not check for new build" we can update it later after installation.


If you have created your own website than click on the drop down in Website and select appropriate one. Else leave it the default one.


Let the Launch GFI MailArchiver check box checked to launch the console.


Authenticating user, user should be domain admin.


GFI MailArchiver is completed successfully.
This completes the first part of 3 part article of Install and Configure GFI MailArchiver for Exchange Server 2010. In second part we will configure different options of GFI MailArchiver for exchange server 2010 to archive emails.

Cheers,
Gulab Prasad

How to create DAG in Exchange Server 2013

Lets get started, as we all know that Exchange Server 2013 RTM has been released for public few months ago.

Today we are going to Create and Configure Database Availability Group (DAG) in Exchange Server 2013 RTM running on Windows Server 2012.
LAB Environment:


Login to EAC (Exchange Admin Center) with Administrator rights. Click on Servers in the left pane, click on Database Availability Groups and Click on + sign to create the DAG.


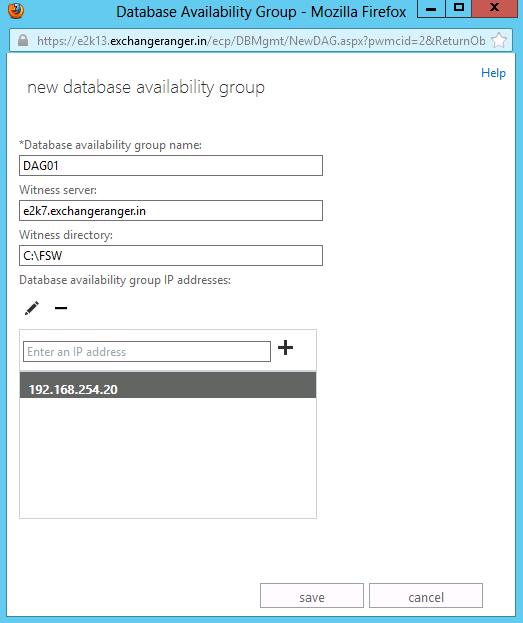
Now specify the name of the DAG, File Share Witness Server and Witness Directory. In my case I am using Exchange Server 2007 as FSW Server and Witness Directory. We will define the DAG IP Address as well.
Note: This will be specifically for DAG, this is nothing but virtual IP for DAG.


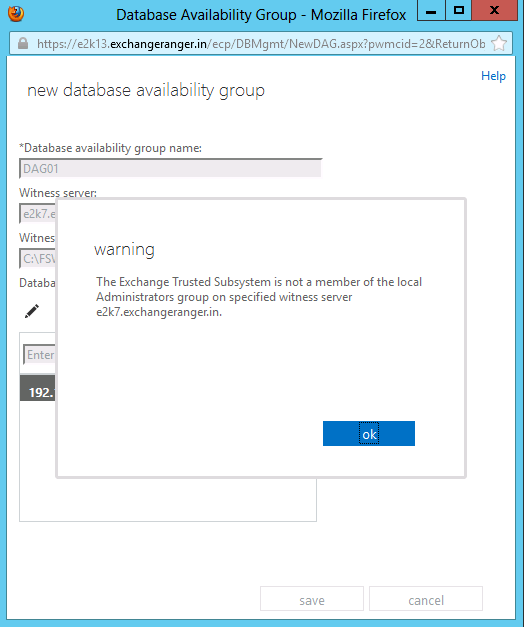
Click on Save you will get the below warning message, which you can ignore. This warning message has been there with DAG since exchange server 2010 days and Microsoft has failed to fix the issue till date.


In EAC now we will see the DAG01 object. DAG is nothing but an empty object in the active directory, if you check the Adsiedit.msc for DAG you will see nothing in it, as we haven't added any member server in it.


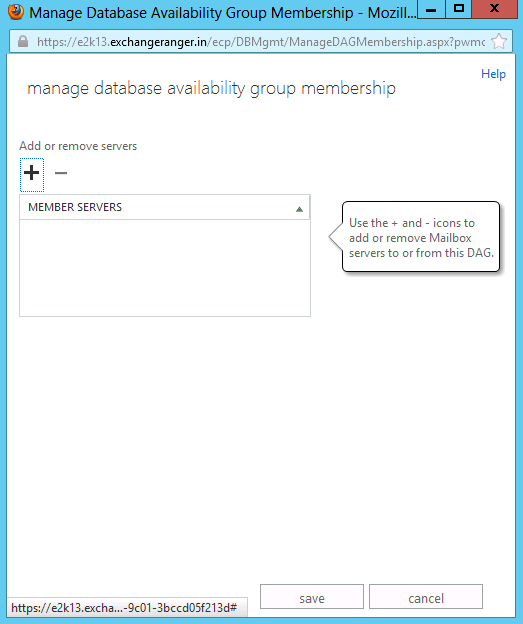
As we have DAG created and we will now add the member servers into the DAG. Click on Manage Member Servers and follow the instructions.


Click on + sign to add the servers.


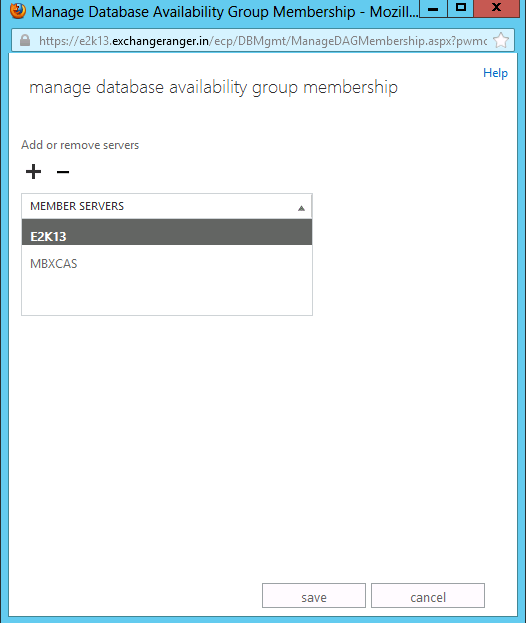
Select the servers you want to add it as a member of the DAG and click on add button.


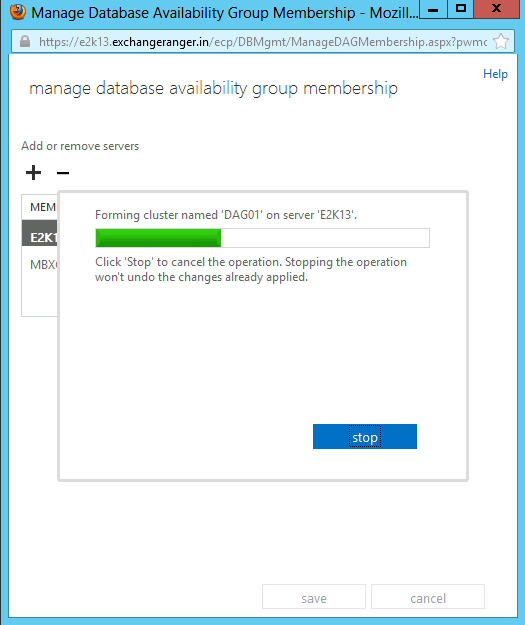
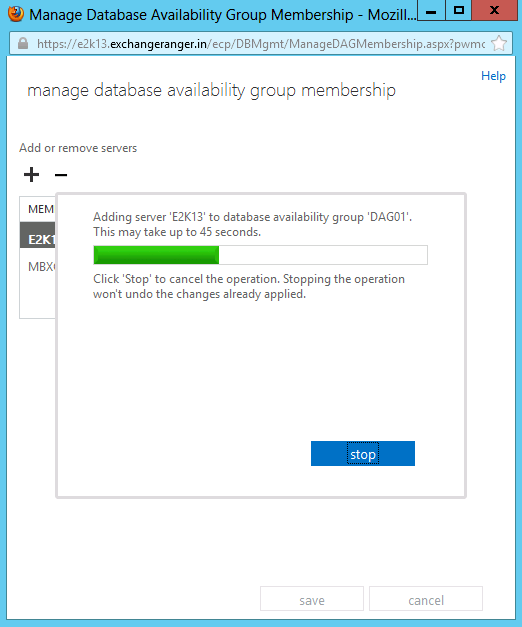
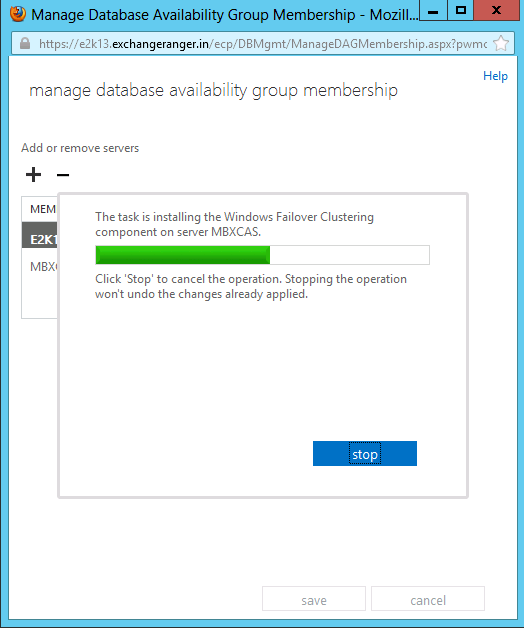
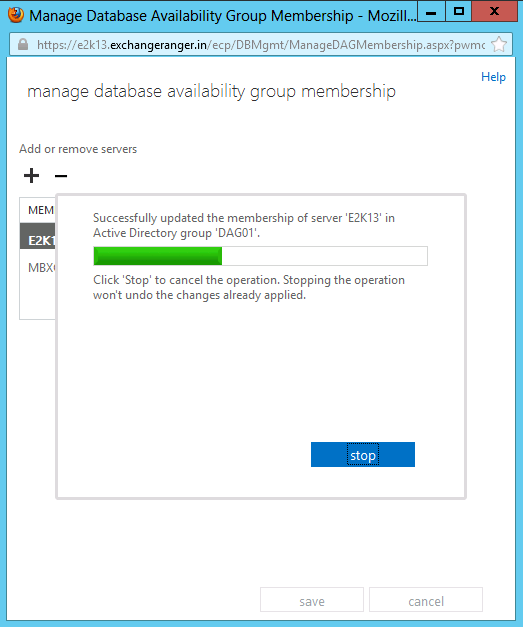
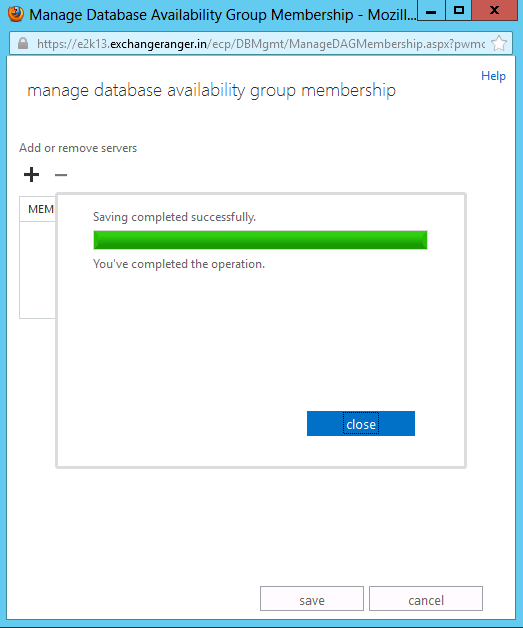
Click on Save and after you click on Save, it will install Windows Failover Clustering Components on the member servers and configure the cluster.


We have now added the member server in the DAG successfully, now it's time Add-MailboxDatabaseCopy from One (Active) Server to another (Passive). In my case E2K13 is the Active Server and MBXCAS is Passive Server.

We can only use EMS (Exchange Management Shell) to Add MailboxDatabaseCopy. We cannot use EAC to Add the MailboxDatabaseCopy. In Exchange 2010 RTM we had the same situation. We had only EMS option to add the MailboxDatabaseCopy.


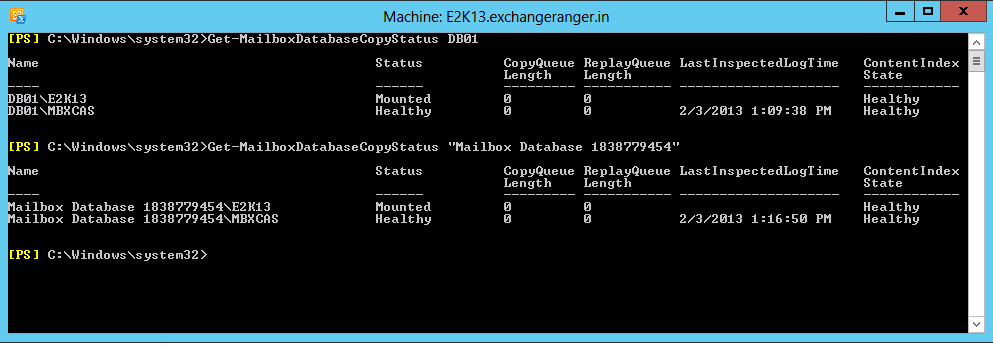
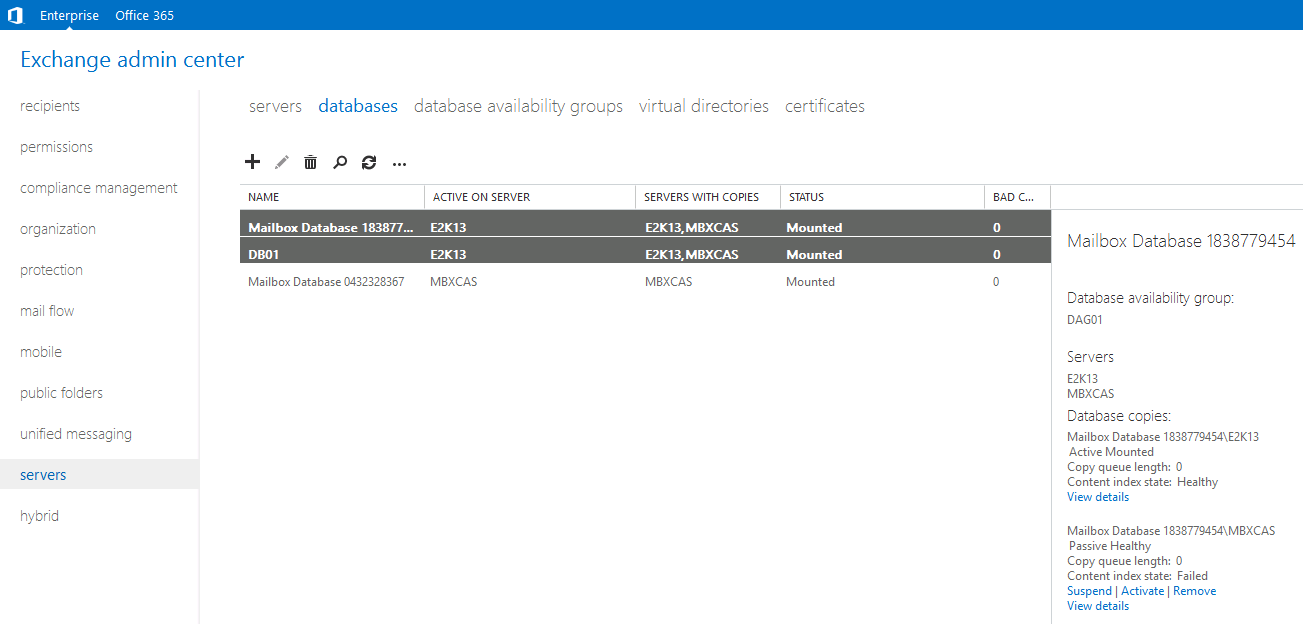
After Add-MailboxDatabaseCopy completed successfully, lets check the status of the Database by running the command Get-MailboxDatabaseCopyStatus and the output of the command and EAC should be as shown in the below image.


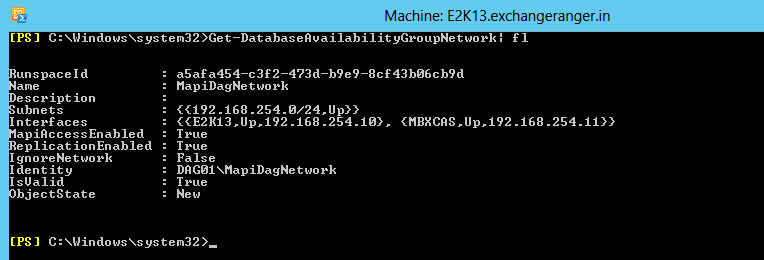
Last but not the least check the replication health by running the Test-ReplicationHealth and Get-DatabaseAvailabilityGroupNetwork | fl.


I hope it helps.

Cheers,

EXCHANGE RANGER